How to Fix Invisible Zipper Problems at Home?

That sinking feeling when your favorite dress zipper gets stuck halfway up your back is all too familiar. An invisible zipper that won’t cooperate can turn getting ready into a frustrating ordeal, but the good news is that many common invisible zipper problems have simple solutions you can fix at home.
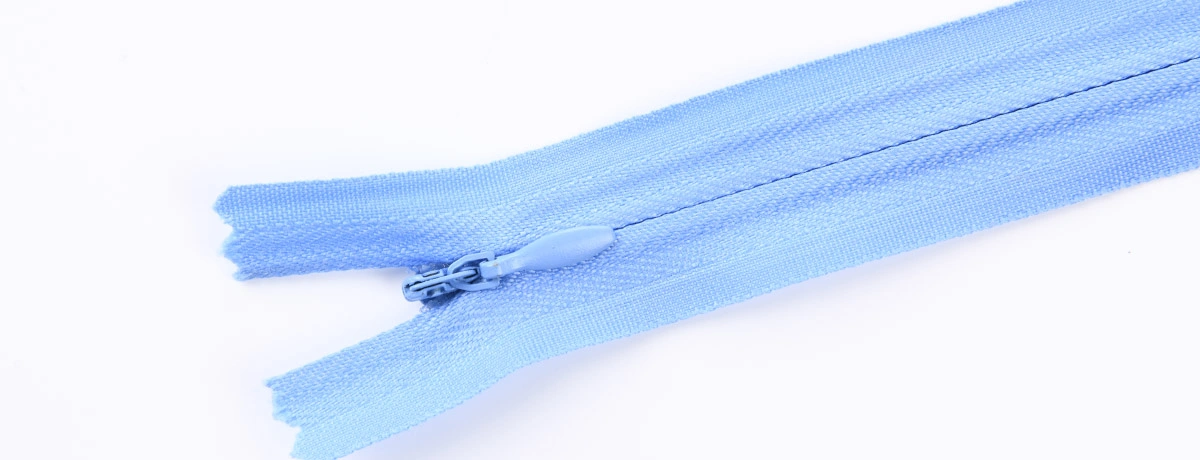
An invisible zipper is a special type of zipper where the zipper teeth are hidden behind the zipper tape when properly closed, creating a nearly seamless appearance. Unlike regular zippers where the teeth are visible, invisible zippers add a flattering touch to garments by maintaining clean lines. However, invisible zippers tend to be more delicate and require gentler handling than their standard counterparts.
Before you consider replacing the whole zipper or taking your garment to a tailor, try these proven methods to diagnose and fix the most common invisible zipper problems. We’ll walk you through everything from identifying what’s wrong to applying the right solution, plus when it’s time to stop trying and seek professional help.
Introduction to Invisible Zippers
Invisible zippers are a popular choice for anyone looking to add a sleek, polished finish to their garments. Unlike traditional zippers, an invisible zipper is designed so that the zipper teeth and tape are hidden within the seam, leaving only the zipper pull visible at the top. This creates a flattering touch that blends seamlessly into dresses, skirts, blouses, and other fitted clothing. However, because the zipper slide and the mechanism are more delicate, invisible zippers can sometimes split at the seam or the zipper slide may detach from the zipper altogether. Understanding how these zippers work—and the common issues that can arise—will help you keep your favorite garments looking their best and functioning smoothly.
Quick Diagnosis - What’s Wrong With Your Invisible Zipper?
The key to fixing any broken zipper starts with identifying exactly what’s going wrong. Take a close look at your zipper and check for these common issues:
Check if the zipper slider is stuck in one position and won’t move up or down. This is the most common problem with invisible zippers. Sometimes, the slider may stop cooperating—meaning it refuses to slide smoothly, feels completely locked in place, or requires excessive force to move even slightly.
Look for fabric threads or material caught between the zipper teeth. Examine both sides of the zipper carefully. You might see loose threads, fabric from the garment itself, or even lining material trapped in the zipper mouth where the slider moves.
Examine if the zipper has separated completely from the bottom, leaving two loose tape sides. When this happens, the left side and right side of the zipper are no longer connected, and you can see a gap even when you try to zip it up.
Test if the zipper feels rough or catches when moving, even when not stuck. Run the slider up and down slowly. A properly functioning zipper should move smoothly without requiring a good tug or catching at specific spots.
Inspect for bent, broken, or missing zipper teeth along the tape. Look closely at the bottom most zipper teeth and work your way up. Damaged teeth often appear flattened, bent outward, or completely missing from the zipper tape.
Note if the zipper slider has come completely off one or both sides of the tape. Sometimes the slider completely separates from the zipper, leaving you holding the zipper pull with no way to reconnect it to the tape.
Once you’ve identified which problem matches your situation, you can move on to the appropriate repair method.
Method 1: Fixing a Stuck Zipper Slider
When your zipper slider won’t budge, resist the urge to force it. Instead, try these gentle techniques that often work properly without damaging the delicate mechanism.
Gently wiggle the zipper pull left and right while applying light upward or downward pressure. Hold the garment steady with your free hand and use small, controlled movements. The goal is to help the slider find its proper alignment with the zipper teeth rather than forcing it past an obstruction.
Work the slider slowly back and forth in small movements rather than forcing it. If the zipper moves even slightly, that’s progress. Make tiny adjustments in both directions, gradually increasing the range of motion as the zipper begins to cooperate.
If the slider moves slightly, continue working it gradually until it reaches the end. Once you get some movement, be patient. Each small victory makes the next movement easier as you work past whatever was causing the zipper to stick.
Push the slider all the way to the top before attempting any major adjustments. Getting the zipper completely closed gives you the best starting position for diagnosing other issues and ensures the zipper teeth are properly aligned.
Some invisible zippers have a lock mechanism in the slider. If this lock is engaged or malfunctioning, it can prevent the slider from moving. Check the lock component to ensure it is not stuck or damaged.
Warning: Forcing a cheap zipper too hard may permanently damage the teeth or slider. If you feel significant resistance after a few tries, stop. Excessive force can bend the slider, break the zipper teeth, or even tear the fabric around the zipper seam, turning a simple repair into a complete replacement job.
Method 2: Removing Fabric Caught in Zipper
When fabric gets trapped in your invisible zipper, patience and the right technique will free it without damaging your garment or the zipper mechanism.
Inspect the zipper carefully to locate exactly where fabric is trapped in the teeth. Look for the specific spot where material has been pulled into the zipper mouth. You might see fabric bunched up around the slider or threads extending from the zipper area.
Use clean tweezers or your fingernails to gently pull the caught fabric away from the zipper. Grip the trapped material as close to where it enters the zipper as possible. Avoid pulling on the main body of the garment, which could create additional snags or tears.
Pull the fabric in the opposite direction from where the zipper slider would move. If the slider was moving up when the fabric got caught, pull the fabric downward and away from the zipper path. This works with the zipper mechanism rather than against it.
Work patiently with small tugging motions rather than one strong pull that could tear the garment. Use gentle, repeated motions to gradually work the fabric free. This approach preserves both the fabric and the zipper teeth.
Once fabric is freed, test the zipper by moving the slider slowly up and down. Make sure the slider completely clears the area where the fabric was trapped and that it moves smoothly through the entire length of the zipper.
Trim any loose threads near the zipper area to prevent future snags. Use small, sharp scissors to carefully remove any frayed threads or loose material that could cause similar problems. Be extremely careful not to cut the zipper tape or any structural seams.
Method 3: Fixing Separated Zipper (Split Zipper)
A zipper that splits open after closing can often be fixed by properly realigning the slider with the zipper teeth using this methodical approach.
Examine if the zipper slider is still attached to at least one side of the tape. If the slider has come off completely, you’ll need to work from the very bottom. If it’s still attached to one side, note which side and work accordingly.
Carefully slide the zipper pull down to the very bottom of both tape sides. Work slowly to avoid damaging the bottom most zipper teeth. You want the slider positioned at the lowest possible point where both sides of the zipper tape meet.
Align both sides of the zipper tape so the teeth face each other properly. The left section and right section of the zipper should line up evenly at the bottom. Take a moment to ensure the zipper teeth on both sides are properly positioned to mesh together. Make sure the left section is properly positioned for threading through the slider. Depending on where the separation occurred, you may need to start reattaching the slider from the top right portion or the very top of the zipper tape.
Insert both tape ends into the slider simultaneously, ensuring equal insertion on both sides. This is the most critical step. Feed both sides into the zipper mouth at exactly the same time, making sure neither side goes deeper than the other. The left section and right section must be perfectly even. Applying opposing force by gently pulling the tape ends apart can help guide the slider back onto the teeth.
Gently pull the slider upward while holding the tape ends firmly to engage the teeth. Use steady, even pressure while keeping the tape ends aligned. You should feel the zipper teeth begin to mesh together as the slider moves up.
Warning: If teeth are damaged, the slider is bent, or the end sections (top and bottom stops) are damaged or missing, complete replacement or professional repair may be necessary. If the zipper continues to separate after several attempts with this method, the problem likely lies with damaged components that can’t be fixed through realignment alone.
Method 4: Using Lubricants for Smooth Operation
When your invisible zipper feels rough or catches during operation, proper lubrication can restore smooth functionality. Always test any lubricant on a hidden area first to avoid staining.
Graphite Method (Safest Option)
Use a regular wooden pencil to rub graphite along both sides of the zipper teeth. Hold a sharpened pencil at a slight angle and gently rub the graphite directly onto the teeth where they contact the zipper slider. This method works properly on all fabric types without risk of staining.
Apply light pressure while coating the teeth where they connect with the slider. Focus on the areas where the slider makes contact with the zipper teeth, typically along the seam line where the zipper operates. You don’t need heavy coverage—a light coating is sufficient.
Test the zipper movement and wipe excess graphite from surrounding fabric. Move the slider up and down several times to distribute the graphite, then use a clean cloth to remove any visible graphite from the fabric or zipper tape.
Repeat application if the zipper still feels rough or catches. Some zippers may need a few applications to achieve smooth operation, especially if they haven’t been maintained regularly.
Household Lubricant Method
Choose a safe lubricant like bar soap, lip balm, or candle wax (avoid petroleum jelly on delicate fabrics). These household items provide effective lubrication without the harsh chemicals found in some commercial products. Bar soap is particularly effective and safe for most materials.
Apply a thin layer only to the zipper teeth, avoiding the fabric completely. Use your finger to rub the lubricant directly onto the teeth, being careful to keep it off the surrounding fabric. A small section at a time works best for even coverage.
Use cotton swabs for precise application with messier substances. Cotton swabs give you better control when applying lip balm or other sticky lubricants, reducing the risk of getting lubricant on the fabric.
Test zipper movement and clean any residue from the garment afterward. After lubricating, run the slider through its full range of motion several times, then wipe away any excess lubricant with a clean, dry cloth.
Warning: Always test lubricants on hidden fabric areas first to check for staining. Apply a small amount of your chosen lubricant to an inside seam or hem area and wait 24 hours to ensure it doesn’t discolor or damage the fabric.
Replacing the Zipper Tape
If you discover that the zipper tape on your invisible zipper is damaged or broken, replacing it can restore your garment’s functionality. Start by using a seam ripper to carefully remove the old zipper tape from the seam, taking care not to damage the surrounding fabric. Once the old tape is out, thread the new zipper tape through the zipper slider, making sure the tape is properly aligned on both sides. To keep everything in place as you work, use wonder tape to temporarily secure the new tape to the fabric. After the new tape is positioned, reattach the zipper slider and test the zipper to ensure it moves smoothly and closes completely. This process can take a few tries, but with patience and the right materials, you can give your garment a new lease on life.
When to Replace Your Invisible Zipper
Sometimes the most practical solution is to accept that a zipper has reached the end of its useful life. Recognizing when to stop trying repairs can save you time, frustration, and potential damage to your garment.
Multiple broken or missing teeth along the zipper tape that cannot be bypassed. When several teeth are damaged across different sections of the zipper, repairs become increasingly difficult and unreliable. The zipper will likely continue to fail at multiple points.
Slider that completely breaks apart or has damaged internal mechanisms. If the actual zipper slider cracks, loses pieces, or no longer maintains proper tension on the zipper teeth, replacement parts may not be readily available for invisible zippers. If the zipper tab is missing or damaged, it can make the zipper unusable and may require replacement.
Zipper tape that tears or frays beyond the repairable section. The zipper tape provides the structural foundation for the entire zipper system. Once it’s compromised, even a functioning slider won’t work properly, and the zipper will continue to separate from the fabric.
Metal bar or stops at the top or bottom that break off and cannot be secured. The top stop and bottom stop prevent the slider from coming off the zipper entirely. Without these crucial components, the zipper cannot function safely or reliably.
Repeated separation issues even after successful temporary repairs. If you’ve successfully completed repairs but the same problem keeps recurring, the zipper may be experiencing stress from poor fit, worn components, or structural issues that can’t be fixed.
Professional seamstress recommendation: replacement costs less than multiple repair attempts. When considering the time investment and potential for failure, a complete zipper replacement by a skilled seamstress often provides better value and longer-lasting results than repeated DIY attempts.
Conclusion
Learning how to fix invisible zipper problems empowers you to handle many common wardrobe malfunctions without professional help. Start with the simplest solutions—gentle manipulation for stuck sliders, careful fabric removal for snags, and proper realignment for split zippers. These methods solve most invisible zipper issues when applied patiently and correctly.
Remember that not every zipper problem has a DIY solution. When you encounter extensive damage to the zipper teeth, broken sliders, or repeated failures after repair attempts, professional replacement is often more cost-effective than continued troubleshooting. The same process that helps you fix minor issues also teaches you to recognize when it’s time to seek professional help.
Keep this guide handy for future reference, and consider sharing it with friends who might face similar zipper challenges. With the right approach and realistic expectations, you can keep your favorite garments functional and looking their best.
Contact MH
MH offers invisible zippers. Please contact us for more details or inquiries. We're here to help!