How to Use Tailor Chalk: A Practical Guide for Beginners
Tailor chalk is an essential tool for any sewing project, allowing you to mark fabrics with precision. In this guide, you’ll learn how to use tailor chalk correctly, choose the right type for your fabric, and remove markings without damaging your material.
Key Takeaways
-
Start with a clean, pressed fabric to ensure accurate chalk markings and a polished final product.
-
Different types of tailor’s chalk—clay, wax-based, and water soluble—serve specific fabric types and marking needs.
-
Always test your chalk on a scrap piece of fabric before use, and remove marks properly to avoid staining.
Preparing Your Fabric
Before picking up your tailor’s chalk, start with a clean slate. A clean, pressed, and flat fabric is the first crucial step in any sewing project. Although it might seem obvious, wrinkles or folds can often throw off your markings, leading to inaccuracies and wasted effort.
Imagine trying to draw a straight line on a crumpled piece of paper; the results would be far from perfect. The same principle applies to fabric. Ironing your cloth to eliminate wrinkles ensures that your markings are precise and that your pattern cutouts are spot-on.
Remember, a well-prepared material fabric is the foundation of a beautifully finished garment or quilting quilt, so don’t let worry affect your creative process.
Types of Tailor's Chalk and Their Uses
Tailors chalk is a versatile tool, but not all chalks are created equal. Different types of tailors chalk cater to various fabrics and marking needs. Understanding the distinctions between them will help you choose the right one for your project.
Clay chalk, wax-based chalk, and water soluble chalk each have unique properties that make them suitable for specific tasks. From marking stitching lines to outlining darts and pleats, the right chalk can make all the difference in achieving clean, professional results. Let’s dive into the specifics of each type.
Clay Chalk
Clay chalk is your go-to for woven fabrics. This type is particularly suited for creating sharp, precise lines that stand out clearly against the cloth. If you’re working on a project that requires detailed and accurate markings, clay chalk is an excellent choice. It produces less chalk dust compared to other types, making it a cleaner option for intricate work.
Wax-Based Chalk
When dealing with thicker fabrics that can withstand heat and steam, wax-based chalk is your best bet. This type of chalk embeds itself within the fabric fibers, ensuring that your markings stay put until you’re ready to remove them.
This is especially useful for projects involving heavy materials where other chalks might not adhere as well, especially hard chalk.
Water Soluble Chalk
For delicate fabrics like silk, water soluble chalk is a lifesaver. Key benefits include:
-
Easily washes away, leaving no residue behind
-
Perfect for materials that can’t handle high heat or vigorous scrubbing
-
Ensures markings are temporary and won’t damage the fabric when working on sensitive projects with soap.
Water soluble chalk is also versatile. Whether you’re marking stitching lines or outlining pattern pieces, it provides clear, easily removable lines. This makes it ideal for both beginners and experienced sewists who need flexibility in their markings, including the use of a chaco liner.
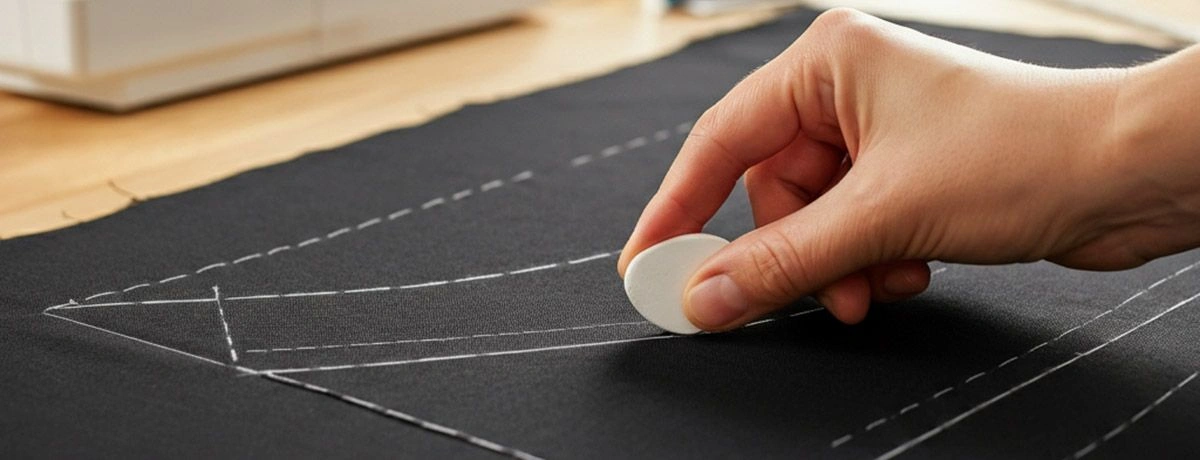
Using Tailor's Chalk Correctly
Now that you know the types of tailor’s chalk, it’s time to learn how to use it correctly. Tailor’s chalk is essential for outlining patterns and marking hemlines accurately. However, it’s crucial to stabilize your fabric layers with pins or weights to prevent any movement during the marking process. This ensures your lines remain straight and precise.
Always test your chalk on a fabric scrap before full application. This helps you avoid unwanted staining or discoloration and ensures the chalk will wash out easily. With these practices in place, you’ll be able to mark your fabric with confidence and accuracy.
Marking Seam Allowances
Marking seam allowances is a fundamental skill in sewing. To do this accurately, follow these steps:
-
Ensure your fabric is flat and smooth.
-
Use a ruler or tape measure to guide your chalk.
-
Draw clear, straight lines that indicate where your seams will go.
This practice is essential for creating garments that fit well and look professional when you tip press.
Seam allowances can vary depending on the pattern, so always double-check the measurements specified in your instructions. Precision here can make a significant difference in the final outcome of your project.
Drawing Stitching Lines
When it comes to drawing stitching lines, a ruler or straight edge is your best friend. This helps create clean, straight lines that are easy to follow when sewing. Choosing the right tailor’s chalk for your fabric type ensures that these lines are clear and won’t smudge during the sewing process. Additionally, having the right sewing tools can enhance your overall experience.
For woven fabrics, clay-based chalk works wonders, providing precise lines that guide your stitching perfectly. On thicker fabrics, wax-based chalk can be set with an iron, making the lines more durable and easier to follow.
Marking Darts and Pleats
Marking darts and pleats accurately is crucial for achieving a well-fitted garment. Using tailor’s chalk, you can transfer the pattern details directly onto your fabric, ensuring that all pivotal points are clearly marked. This precision helps in aligning the darts and pleats correctly during sewing.
Before you start marking, it’s wise to test the chalk on a small, hidden area of your fabric. This ensures there are no adverse reactions, and the chalk will remove cleanly. With these careful steps, your garment will have a polished, professional look.
Sharpening and Maintaining Tailor's Chalk
To keep your tailor’s chalk in top condition, regular maintenance is key. Sharpen your chalk with a sharp knife or blade at a 45-degree angle to create a fine edge for precise marking. This ensures your lines remain sharp and accurate, even as the chalk wears down.
Proper storage is equally important. Keep your chalk away from moisture to prevent breakage or hardening. This helps maintain its usability and ensures that your markings are always clear and effective.
Removing Tailor's Chalk Marks
Removing tailor’s chalk marks can be as important as applying them. Pressing too hard can embed the chalk into the fabric fibers, making it difficult to remove later. Additionally, failing to remove chalk marks before ironing can set them permanently into the fabric.
Different types of chalk require different removal methods. For example, erasable chalk is particularly useful for marking darts and pleats since it can be easily removed and adjusted.
Wet Cloth
One of the gentlest ways to remove chalk marks is with a damp cloth. This method is ideal for water soluble chalk, especially on delicate fabrics. Simply use the damp cloth to gently wipe the marked area, ensuring that no damage occurs to the fabric. This approach maintains the integrity of your cloth while effectively removing the markings.
Water soluble powdered chalk is particularly useful for marking delicate fabrics, as its marks can be easily washed out. This makes it a preferred method for fabrics that require careful handling.
Iron
For wax-based chalk, setting your iron to the appropriate heat level for your fabric type and gently pressing it over the marked areas can help remove the marks. This method is effective for thicker fabrics that can handle the heat without damage.
Erasers and Brushes
Eraser and brushed fabric brush are excellent tools for cleaning up any remaining chalk residue after the main removal process. These marking tools are particularly effective in ensuring that your fabric is completely free of markings, leaving your project looking clean and professional.
Common Mistakes and How to Avoid Them
The wrong type of tailor’s chalk for your fabric can lead to inaccurate markings and potential damage on the wrong side. Understanding the different methods for using and removing tailor’s chalk depending on its type is crucial. This helps you avoid common pitfalls and achieve better accuracy in your projects.
Another frequent mistake is not removing chalk marks properly, which can result in permanent stains. Make sure to test your chalk on a small, hidden area of the fabric before full application to check for any adverse reactions. This simple step can save you a lot of trouble down the line.
Choosing the Right Tailor's Chalk for Your Project
Selecting the right tailor’s chalk is crucial for the success of your project. Different types of chalk are designed for various fabric types and marking needs. For instance:
-
Wax chalk is recommended for heavier fabrics that can tolerate heat and steam.
-
It adheres well to thicker materials.
-
It can be set with an iron for more permanent marks.
Using the wrong type of chalk can make it difficult to remove the markings or even damage the fabric. By understanding the specific uses of each type of chalk, you can choose the best one for your project and avoid common mistakes.
Summary
In summary, using tailor’s chalk effectively involves choosing the right type for your fabric, preparing your fabric properly, and applying and removing the chalk correctly. Each type of chalk has its specific uses and benefits, from clay chalk for woven fabrics to water soluble chalk for delicate materials.
Remember, practice makes perfect. The more you experiment with different types of tailor’s chalk and techniques, the more skilled you’ll become. So grab your chalk, prepare your fabric, and start marking your way to beautifully finished projects.
Frequently Asked Questions
What type of tailor's chalk should I use for delicate fabrics?
For delicate fabrics, water-soluble chalk is your best bet since it washes out easily and won't leave any residue. It's a smart choice to keep your projects looking pristine!
How can I remove wax-based chalk marks from my fabric?
To get rid of wax-based chalk marks, simply heat your iron to the right setting for your fabric and gently press it over the marks. This method will help lift the chalk right off!
Why is it important to test tailor's chalk on a small fabric area before full application?
It's crucial to test tailor's chalk on a small, hidden fabric area first to check for any adverse reactions and to make sure it removes easily without leaving marks. This little step can save you from a lot of frustration later!
How can I sharpen my tailor's chalk for more precise markings?
You can easily sharpen your tailor's chalk with a sharp knife or blade at a 45-degree angle, which will give you a fine edge for more precise markings. Happy sewing!
What can I do to prevent tailor's chalk from hardening or breaking?
To keep your tailor's chalk from hardening or breaking, make sure to store it in a dry place and avoid moisture. This simple tip will help you maintain its quality for longer!
Contact MH
MH offer tailor chalks, feel free to reach out to us for more details or inquiries. We're here to help!