How Do I Make a Bow from Ribbon?
Key Takeaways
-
Wired polyester and grosgrain ribbons in 1.5–2.5 inch widths are the most reliable choices for creating consistent, shapeable ribbon bows across both small and large production runs.
-
Basic bow making involves forming equal ribbon loops, securing the center with wire or a tie, then shaping the loops and trimming tails to the desired length.
-
For commercial and bulk applications, material stiffness, width tolerance, and color consistency matter more than intricate DIY techniques.
-
Pre-made bows with adhesive pads or twist ties can significantly speed up packaging lines while reducing skill requirements at the packing stage.
-
This guide covers both simple bow creation and the material and production considerations essential for B2B buyers in packaging, floral, and garment industries.


Introduction: From Simple Bows to Bulk Production
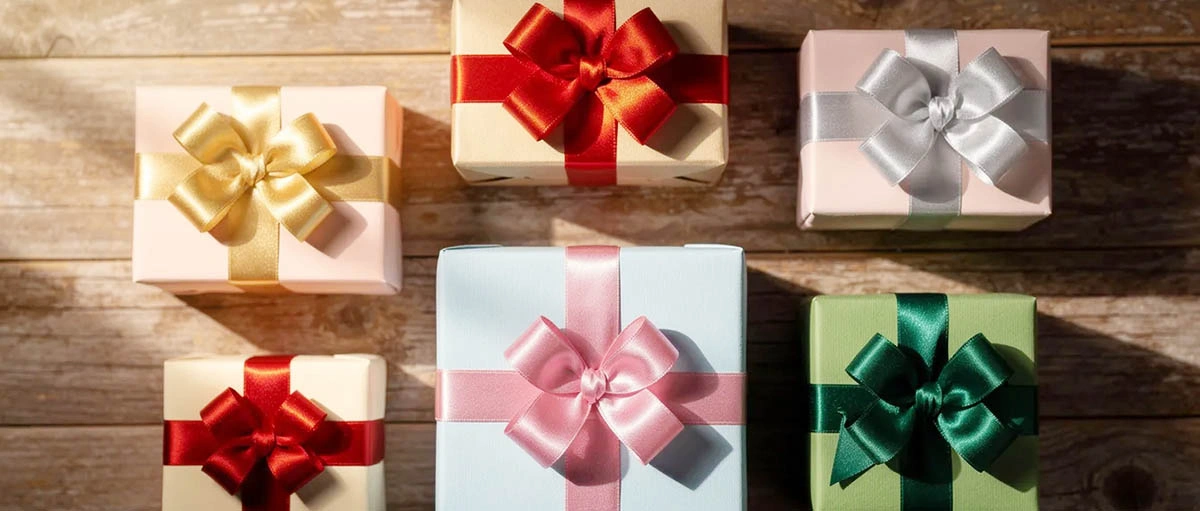
A ribbon bow serves as the perfect finishing touch on gift boxes, wreaths, apparel packaging, and promotional displays. Whether you need a simple bow for a single present or thousands of finished bows for an e-commerce fulfillment center, the fundamentals remain the same.
This article will explain how to make a bow from ribbon in straightforward terms, then shift focus toward material selection and production considerations for commercial use. The goal is to help buyers choose suitable ribbons for reliable, repeatable bow making in volume rather than exploring complex DIY crafts.
Bulk bows are needed across many sectors: gift box factories preparing holiday inventory, florists assembling daily bouquet orders, garment brands adding a finishing touch to packaging, and seasonal décor suppliers stocking wreaths and christmas tree toppers. Understanding both the technique and the materials makes all the bows more consistent.
What You Need to Make a Bow from Ribbon
Even the easiest bow benefits from the right combination of ribbon type, fastening method, and basic tools. In commercial settings like packaging lines, these same supplies are standardized to keep bows consistent across thousands of items.
This section stays high-level and practical, listing the minimum requirements for both small-scale and large-scale bow making.
Ribbon Types and Widths
Wired ribbon in 1.5–2.5 inch widths is the most forgiving option for shaping ribbon loops that hold their form on gifts and wreaths. The wire edge allows you to create loops, twist tightly at the center, and maintain volume during handling and shipping.
Non wired ribbon like satin ribbon and grosgrain is common for apparel packaging or hair accessories where a softer drape is preferred. These materials lay flatter and create a more subtle, elegant appearance.
For width selection:
-
3–10 mm: Garment tags, small favors, and very small boxes
-
10–25 mm: Mid-size gift boxes and boutique packaging
-
25–63 mm: Gift hampers, floral arrangements, and decorative displays
In bulk orders, consistent width tolerance (typically ±0.5 mm) is crucial so automatic tying machines and templates work correctly across production runs.
Fasteners: Wire, Ties, and Other Options
Several options work for securing the center of the bow:
|
Fastener Type |
Best For |
Notes |
|---|---|---|
|
Floral wire |
Traditional bows, wreaths |
Easy to twist and trim |
|
Chenille stem / pipe cleaners |
Color-matched applications |
Can match ribbon shade |
|
Twist ties |
High-speed packaging |
Pre-attached options available |
|
Thin ribbon strips |
Luxury presentation |
Creates seamless look |
In industrial packaging, pre-attached twist ties or wire stems speed up production, especially on floral picks and bottle neck decorations. For children’s products or food packaging, buyers may prefer plastic or fabric fasteners instead of bare metal wire for safety compliance.
Keep fastener color close to the ribbon when bows will be viewed up close on luxury gift boxes or boutique bags.
Basic Tools
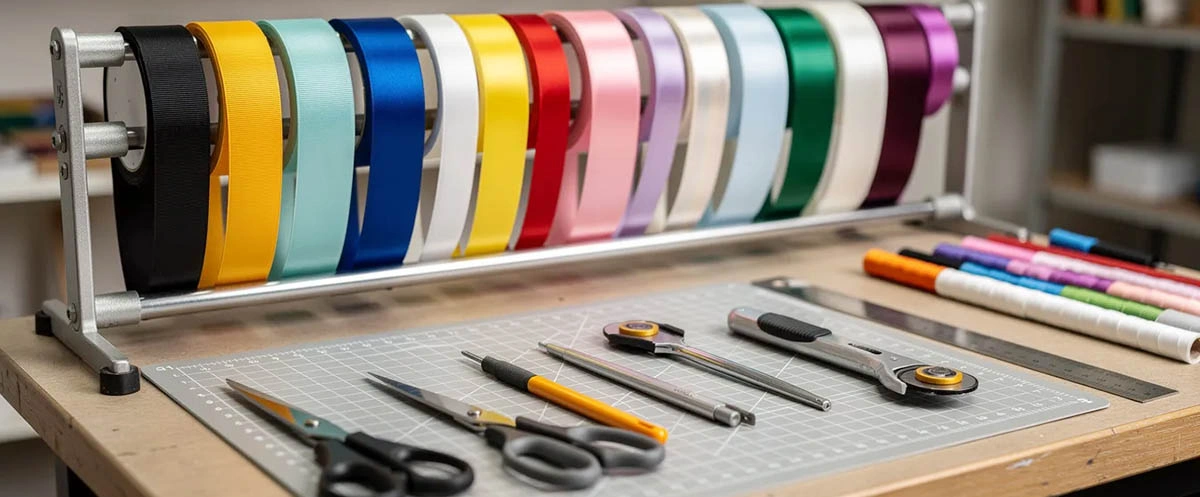
Essential tools include standard tailoring materials and tools:
-
Sharp scissors: A sharp pair of fabric scissors ensures clean ribbon edges and precise cuts
-
Wire cutters: For trimming floral wire, zip ties, or wired ribbon ends
-
Measuring tools: Rulers, marked cutting boards, or jigs help keep loop lengths consistent
On a production line, hot-cut or ultrasonic-cut equipment seals ends and reduces fraying for synthetic ribbons. Simple measuring jigs help staff produce repeatable bow sizes without guesswork.
How to Make a Simple Bow from Ribbon
Making a decorative bow out of ribbon is a simple way to add a gorgeous handmade touch to your wreath, gift, or any craft project. The key to a beautiful bow out of ribbon is creating symmetrical loops and shaping the bow for a polished, decorative appearance. You can make a bow with any type of ribbon, including wired and non-wired options like satin, grosgrain, or burlap, each giving a different look. Learning to make the perfect bow only takes a few minutes and requires no special tools.
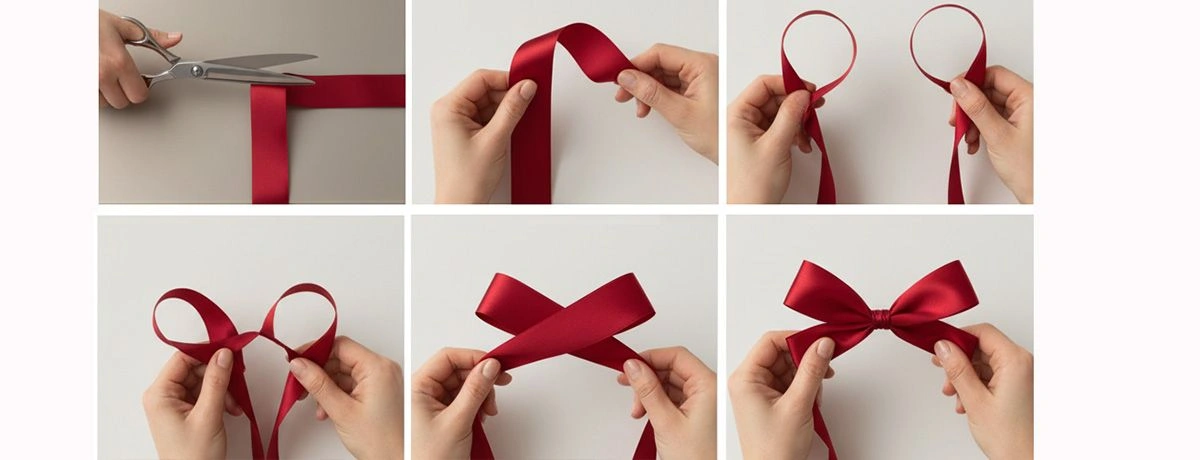
Single-Loop Bow (Bunny Ear Method):
To make a simple bow, start by cutting a length of ribbon. Fold the ribbon in half to find the center—this helps ensure your loops are symmetrical. Form two loops (like bunny ears) and tie them together in a knot, just as you would tie shoelaces. Pull the knot tight to secure the bow and adjust the loops so they are even. For a polished look, wrap a small piece of ribbon or material around the center to conceal the knot. Fluff the bow by pulling the loops apart and separating the two sides of each loop for extra volume. Trim the ends—if you want a dovetail finish, fold each ribbon tail in half lengthwise and cut at a 45-degree angle. The other tail and any short tails can be adjusted for symmetry and style. You can attach the bow to a wreath or gift using a chenille stem or hot glue.
Multi-Loop Bow:
For a fuller bow, use a longer piece of ribbon and make several loops on each side, alternating left and right. The number of loops on each side will equal the number of ribbon circles you make. For example, a 9-loop bow is made by creating alternating loops and twisting the ribbon at the center each time. Hold the center tightly and secure it with a knot, zip tie, or chenille stem. Wrap a piece of ribbon around the center to hide the knot and finish the look. Fluff the loops by pulling them apart and separating the two sides of each loop for a voluminous appearance. Adjust the short tails and the other tail for a balanced finish.
Flat Bow:
Flat bows are created by shaping loops as you go, making them look like a fan. Stack 2-3 different types of ribbon for extra volume and a unique appearance. Secure the center tightly and wrap with ribbon to conceal the knot.
Pom Pom Bow:
Pom pom bows are made by creating multiple loops of ribbon, stacking them, and securing tightly in the center. Fluff the loops outward for a pom pom effect.
Double Bow:
Double bows are made by layering two different ribbons together before forming the loops, resulting in a fuller, more decorative bow.
Additional Tips:
-
You can make a bow without tying it around a package by using a separate piece of ribbon for the loops and attaching it with glue or a chenille stem.
-
A simple bow can be made by tying two loops together, similar to tying shoelaces.
-
Fluffing the bow by pulling the loops apart and adjusting them helps achieve the desired shape and volume.
These techniques work whether you’re making one bow out of ribbon for a sample or training staff to produce bows by hand in small batches.
Single-Loop (Shoelace) Bow
The bunny ear method creates a simple bow similar to tying shoelaces:
-
Form two loops (like bunny ears) from a piece of ribbon
-
Cross them over each other
-
Pull one loop through the opening
-
Twist tightly and adjust
This approach works well with ribbon lengths around 40–60 cm for gift boxes up to 30 cm wide. Adjust longer or shorter depending on package size and desired tail length.
This style is efficient for basic gift wrapping on retail counters where staff need speed more than elaborate design. Even with this simple method, aligning the two loops and trimming the two tails evenly makes the bow look more professional.
Multi-Loop Decorative Bow
Multi-loop bows create fuller, more impressive presentations:
-
Form your first loop and hold at the center
-
Create a second loop on the opposite side of equal size
-
Continue making loops, alternating sides (3–5 loops per side)
-
Pinch the center of the bow firmly
-
Secure with floral wire or a tie
-
Fluff and shape all the loops
More loops create a fuller bow suitable for large hampers, floral arrangements, and holiday displays. A center loop can add height and dimension to the design.
Wide ribbon in 1.5–2.5 inch widths works best for this type. Wired edges allow staff to quickly shape the loops and maintain volume. In small production teams, using marked boards or templates keeps loop lengths uniform.
Flat or Layered Bow
A flat bow is built from several ribbon pieces laid in “X” or stacked layers, then cinched at the center with wire or a tie. This structure creates a wreath bow or door hanger decoration that packs well in shipping cartons.
Key advantages for commercial use:
-
Packs flat in cartons, reducing shipping costs
-
Can be attached to packaging on demand
-
Combines well with layered ribbon styles
Many factories pre-make these flat bows and supply them with attached adhesive pads or ties for quick application. Combining two or three ribbon styles—such as a solid base plus a narrow contrasting accent—creates visual depth without complex tying.
Choosing the Right Ribbon Material for Bow Making
Material composition affects stiffness, shine, cost, and how well the finished bow holds its shape through transport and handling. This section helps B2B buyers understand predictable performance across large ribbon orders.
Polyester Satin and Double-Face Satin
Polyester satin delivers a smooth, shiny appearance widely used for gift boxes, cosmetics sets, and fashion accessories. It’s the go-to choice for creating a perfect bow with elegant shine.
Double-face satin allows both sides of the loop to look identical, simplifying bow tying and reducing twisting adjustments. This matters when ribbon loops twist during formation—either side looks equally polished.
Technical considerations:
-
Works well with heat cutting to seal ends
-
Suitable for both manual ties and semi-automatic bow machines
-
Higher denier (thicker) satin offers better body than very thin tape
-
Available with or without wired edges
Grosgrain and Textured Ribbons
Grosgrain features a ribbed texture that provides more grip and structure. This makes it less slippery than smooth satin and super easy to handle during production.
Common applications include:
-
Garment hangtags and shoe boxes
-
Children’s products where durability matters
-
Applications where bows face repeated handling
Grosgrain maintains bow shape well even without wire edges, making it useful when wire is not allowed or desired. Buyers should confirm color fastness and abrasion resistance if bows will be handled frequently in retail environments.
Organza, Sheer, and Mesh Ribbons
Organza and sheer ribbons are lightweight and semi-transparent, often chosen for bridal, floral, and seasonal decorative bows. Wire-edged organza offers volume and a soft, airy look for merry christmas displays and special occasions.
Quality factors for bulk orders:
-
Weave density affects durability
-
Edge finishing impacts fraying rates
-
May require gentle packing to avoid sharp creases
-
Combines well with opaque base ribbons for layered looks
Velvet, Burlap, and Other Specialty Ribbons
Velvet ribbon offers a dense, luxurious feel for high-end seasonal packaging. Faux-burlap or linen-look ribbons suit rustic themes, wreaths, and autumn packaging where texture matters.
Thicker specialty materials may need:
-
Wider loops to avoid bulky centers
-
Simpler bow forms for cleaner appearance
-
Small loop counts rather than elaborate designs
Always sample a few bow styles with specialty ribbon before committing to large runs. Testing confirms handling characteristics and final appearance before production.
Scaling Up: From Hand-Tied Bows to Commercial Bow Production
The same bow making methods adapt for higher throughput in packaging or décor operations. Success depends on workflow design, training, and choosing between hand-tied production and pre-made bow options.
Standardizing Bow Size and Style
Choose one or two standard bow models for an entire product range:
-
4-loop satin bow for small gift boxes
-
Multi-loop wired bow for hampers and displays
-
Flat layered bow for e-commerce packaging
Define clear specifications including ribbon type, width, bow dimensions, and loop count. This maintains brand consistency across seasons and production teams.
Simple written or illustrated work instructions reduce training time during peak seasons. Request physical bow samples during development and approve them before ordering production quantities.
Cutting and Forming Bows Efficiently
Common production approaches:
|
Method |
Best For |
Investment Level |
|---|---|---|
|
Manual cutting with jigs |
Small batches, varied styles |
Low |
|
Tabletop cutters with stops |
Medium volume, consistent lengths |
Medium |
|
Automatic hot-cut machines |
High volume synthetic ribbon |
High |
Pre-cut ribbon pieces bundled by length simplify distribution to different workstations. Some operations invest in semi-automatic bow-making devices that form and tie bows directly from ribbon reels.
The choice depends on order volume, labor costs, and required flexibility in bow style.
Pre-Made Bows and Attachment Options
Pre-made bows supplied with adhesive pads, twist ties, or elastic loops work well for high-speed pack lines. This approach reduces skill requirements at the packaging stage, shifting complexity upstream to the supplier.
Match attachment type to substrate:
-
Adhesive pads: Boxes and flat surfaces
-
Elastic loops: Bottles and cylindrical items
-
Twist ties: Basket handles, wreath frames, bag closures
Consider storage space and packing density when ordering pre-made bows. Over-fluffy styles may require larger cartons and increase shipping costs.
Frequently Asked Questions
This FAQ addresses practical questions for buyers moving from occasional DIY bows to organized bow production.
How much ribbon do I need for one standard bow?
For a simple 4-loop bow on a small gift box, plan for approximately 40–60 cm of 16–25 mm ribbon per bow. Fuller multi-loop bows for hampers typically use 100–150 cm each, depending on loop size and ribbon width.
Create several test bows, measure actual usage including the end of the ribbon waste, and add a 10–15% safety margin when calculating bulk requirements. This easy tutorial approach prevents shortages during production.
Is wired ribbon always better for making bows?
Wired ribbon holds shape better and suits large decorative bows, window displays, and wreaths. The wire allows you to fold and shape loops that stay put.
However, for garment tags, small hair accessories, or soft gift wrapping styles, non-wired satin or grosgrain creates a more elegant drape. Choose based on how rigid or soft the final bow should appear and how it will be transported.
How can I reduce fraying on ribbon ends in bulk production?
Heat cutting or ultrasonic cutting works best for synthetic ribbons like polyester, creating sealed edges that resist fraying. For manual work, angled or V-cuts (dovetail style) with very sharp scissors fray less than straight cuts.
Some operations use a hot glue gun to seal cut edges on natural fiber ribbons. Test finishing methods with actual packaging conditions before standardizing.
Can the same ribbon be used for both machine and hand-tied bows?
Many polyester satin and grosgrain ribbons work for both applications. However, stiffness and surface finish must suit the machine’s feeding system.
Extremely soft or heavily textured ribbons may jam in automatic equipment or produce irregular loops. Run small trials with intended ribbon before large purchases, and keep a bow tutorial reference for machine operators.
What should I check when approving ribbon samples for bow making?
Key approval checkpoints:
-
Color accuracy against reference standards
-
Width within specified tolerance
-
Surface feel and sheen consistency
-
Stiffness appropriate for intended bow style
-
Staff can form consistent bows without difficulty
-
Shape retention after packing and gentle shaking
Document all approved parameters so future lots match the tested sample. Use a second piece from each batch for comparison during incoming inspection. Attach a pin to hold sample bows in your archive for easy reference.
