Mastering Bias Tape: Easy Techniques and Tips for Perfect Edges
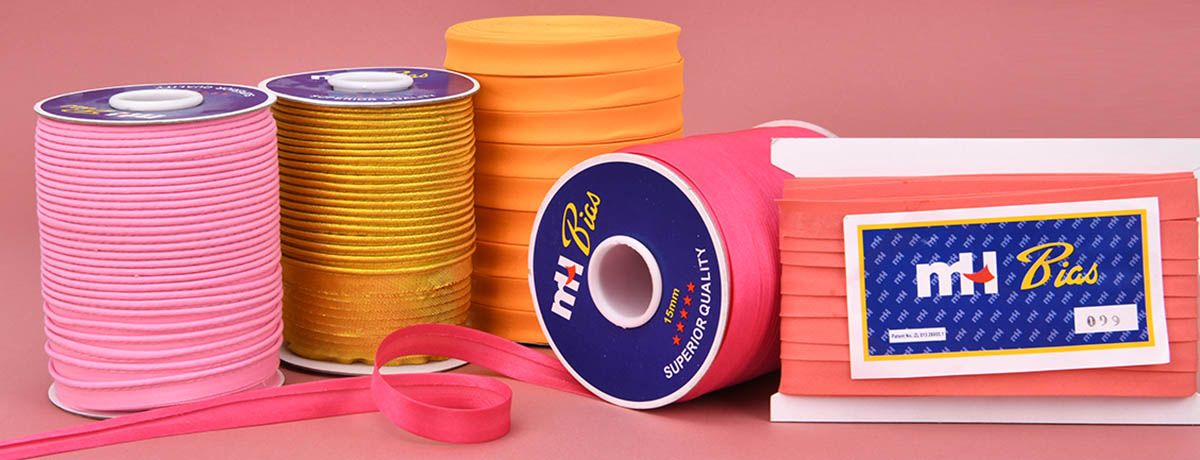
Bias tape is an essential sewing tool used to finish raw fabric edges, bind seams, and add decorative trims. Cut on the fabric’s bias to ensure flexibility, it can conform to curves and provide a clean, professional look to projects. This article will cover everything from understanding what bias tape is to making your own and applying it to your sewing projects.
Key Takeaways
-
Bias tape, cut at a 45-degree angle, is essential for finishing edges and managing curves in sewing projects.
-
There are two main types of bias tape: single-fold for minimal wear areas, and double-fold for more durability and a polished finish.
-
Making your own bias tape is straightforward and allows for customization, while techniques like pressing and careful handling of curves enhance the final results.
Understanding Bias Tape

Bias tape is a strip of fabric cut on the bias at a 45-degree angle, which gives it a unique flexibility and stretch. This characteristic is essential for its functionality, particularly when it comes to finishing raw edges, creating casings for elastic, or adding decorative trims. The real magic lies in its ability to cleanly finish edges and manage curved seams with ease.
Understanding the versatility and importance of bias tape involves exploring its types and recognizing its essential role in sewing.
What Is Bias Tape?
Bias tape is a type of fabric tape made from materials cut at a 45-degree angle, known as the bias. This angle is crucial because it allows the fabric to stretch and conform to curves, making it ideal for various sewing applications. Cutting along the bias grain ensures the strips have some stretch, which allows for better draping and fitting. Bias cut fabric is particularly useful in these scenarios.
Sewing a curved neckline or armhole without the flexibility of bias tape would make managing raw edges extremely difficult. Bias tape simplifies these tasks and adds a polished, professional finish to your projects.
Understanding the fundamental concept of bias tape, whether it’s homemade or pre-made, is key to mastering its use.
Different Types of Bias Tape
Bias tape comes in two primary styles: single-fold and double-fold. Single-fold bias tape, often used as a trim, serves as a facing on one side. It’s folded once in the middle, leaving raw edges that are sewn onto the fabric, ideal for areas with minimal wear.
Double-fold bias tape:
-
Folds twice, encasing raw edges completely
-
Finishes both sides of the fabric
-
Is particularly useful for garments that will be frequently washed or handled
Choosing the right type of bias tape can significantly impact your project’s outcome.
Why Use Bias Tape?
Bias tape primarily finishes raw fabric edges, preventing fraying and providing a clean look. Additionally, it is used to:
-
Bind raw edges
-
Finish seams
-
Create casings
-
Serve as decorative trim
In garment projects like wrap front dresses, wide quilts, and coats, bias tape is indispensable.
A significant advantage of bias tape is its stretchability due to the 45-degree cut, which eases working on curved seams. Using contrasting colors for bias tape can also enhance your sewing project’s visual appeal.
Making your own bias tape allows for customization of colors and patterns, ensuring your projects are unique.
Making Your Own Bias Tape
Creating your own bias tape is a practical way to use leftover fabric and allows for contrasting binding that matches your project. Knowing how to make bias tape is useful when a pattern doesn’t include it, providing flexibility to add necessary bias binding to various sewing projects.
Creating bias tape might seem daunting, but with the right tools and methods, it’s straightforward. Here are the tools you need and two effective methods for making your own bias tape.
Tools You Need
To cut bias strips, you’ll need a quilting ruler, a rotary cutter, and fabric with selvage. These tools ensure precise cuts and maximize fabric use. A quilting ruler helps measure the 45-degree angle accurately, while a rotary cutter provides clean, straight cuts.
Having these tools handy simplifies the process and ensures high-quality bias tape, enhancing your sewing projects. With the right tools, you’re well on your way to mastering bias tape creation.
Method 1: Using a Quilting Ruler
For accurate cuts, lay the fabric flat on a cutting surface and align the 45-degree line of the ruler with the selvage edge. This alignment is crucial for creating cut strips with the right amount of stretch at the center.
To minimize fabric waste, position the ruler close to the fabric edge before cutting. This efficient method ensures you get the most out of your fabric, making it ideal for quilting and other sewing projects.
Method 2: Folding Fabric
To find the bias:
-
Bring the selvedge edge up towards the raw edge.
-
Fold the fabric with the wrong side facing up.
-
Before folding, straighten the raw edge with a ruler and rotary cutter for a clean start.
For easier cutting, fold the bottom corner up to match the bias edges. Ensure the strips have enough width for the desired bias tape. This method is useful for making both single-fold and double-fold bias tape, offering flexibility in your projects.
Sewing With Bias Tape

Bias tape is commonly used to finish raw edges and can add a decorative touch to sewing projects. Whether creating piping, enhancing necklines, or adding trims, bias tape is versatile. Practice on scrap fabric to master its application before starting your actual project.
A walking foot helps manage layers when sewing bias tape pieces, preventing slipping and ensuring even stitching. Clips are often more effective than pins, especially on curved areas, so you might skip using pins altogether.
Properly pressing bias tape ensures a clean finish and significantly improves the look of seams in garments.
Joining Bias Strips
After cutting the strips for bias tape, join them together. Cut the ends of the bias strips at a right angle to ensure proper alignment and create a continuous length of tape.
Use a stitch length of 2 or 2.5 when sewing bias two strips together to provide a strong join without adding unnecessary bulk. Once joined, trim the seams to reduce bulk and press them open for a smooth finish.
Attaching Single Fold Bias Tape
A bias tape makers simplifies the folding process of fabric strips, streamlining folding and pressing bias tape article, saving time and ensuring uniformity for those interested in a narrow strip.
To attach single fold bias tape:
-
Align the raw edge of the fabric with the crease of the tape.
-
Place the tape on the fabric’s right side.
-
Sew along the fold line.
-
Fold the tape over the raw edge.
-
Sew it in place, creating a neat and durable finish on one side of the fabric.
Attaching Double Fold Bias Tape
Double fold bias tape is folded in half and provides a polished finish, especially on curves. To attach it:
-
Place the tape on the fabric edge.
-
Align one fold with the raw edge.
-
Sew it in place.
-
Fold the tape over the edge.
-
Sew again.
This method completely encases the raw edges, creating a durable and professional finish. It’s particularly useful for garments and projects that will be handled frequently, providing extra strength and longevity.
Advanced Techniques and Tips
Bias tape adds a decorative touch while finishing edges cleanly, enhancing the durability of edges in sewing projects and creating clean, professional-looking seams. Mastering advanced techniques can elevate your projects.
Handling curved edges, pressing for a crisp finish, or exploring creative uses, these tips help achieve perfect results every time. Here are some advanced techniques and a tutorial example of skill tips.
Handling Curved Edges
When applying bias tape on curves, pinning it in place prevents shifting and ensures a more accurate fit. Use plenty of pins and sew slowly to maintain an even seam allowance. This careful approach helps navigate curves smoothly and prevents puckering.
To help bias tape bend more easily without puckering, make small notches in the tape. Stretching the bias tape slightly as you sew allows for a smoother application around tight curves.
Pressing and Finishing
Bias tape prevents fraying at edges, extending the fabric’s longevity. Using steam while pressing bias tape molds it into shape, resulting in a cleaner finish. A pressing cloth prevents shine on the fabric and maintains the integrity of the edges.
Press bias tape with steam to set the folds and achieve a crisp edge before sewing. Proper pressing techniques are crucial for a professional finish and significantly enhance your project’s appearance.
Creative Uses for Bias Tape
Bias tape can be used creatively to create decorative trims for garments, enhancing their visual appeal. Using bias tape as decorative trims allows for personalized finishing touches, making sewing projects unique.
Bias tape can be used in several ways:
-
To make piping, adding dimension and character to projects like cushions and garments.
-
To create embellishments such as flowers or rosettes to personalize items.
-
To add details like contrasting colors or patterns on clothing, bags, and home decor items.
Summary
Mastering bias tape is a journey worth embarking on for anyone passionate about sewing. From understanding its basic concepts and types to making your own bias tape and using it creatively, you now have a comprehensive guide to perfecting your sewing projects.
Remember, the key to achieving perfect edges lies in practice and attention to detail. With the techniques and tips shared here, you’re well on your way to creating beautifully finished garments and accessories. Happy sewing!
Frequently Asked Questions
What is bias tape?
Bias tape is a flexible strip of fabric cut at a 45-degree angle, making it perfect for finishing edges and adding decorative touches to your projects. It easily conforms to curves, giving your work a polished look.
What are the types of bias tape?
You'll often come across two main types of bias tape: single-fold for trimming or facing on one side, and double-fold, which neatly finishes edges on both sides. So, choose based on your project needs!
Why should I use bias tape?
Using bias tape is a great way to achieve a clean finish on raw edges and add durability, especially when working with curved seams in your sewing projects. It really helps elevate the look and function of your work!
How do I make my own bias tape?
Making your own bias tape is simple! Just cut fabric strips at a 45-degree angle, join them together, and press them into single or double-fold tape.
How do I attach double fold bias tape?
To attach double fold bias tape, simply position it along the fabric edge, sew one side to secure it, then fold it over and stitch again to cover the raw edges. Voilà! Your edges will be neatly finished.
Contact MH
MH offer bias tapes. Please contact us for more details or inquiries. We're here to help!