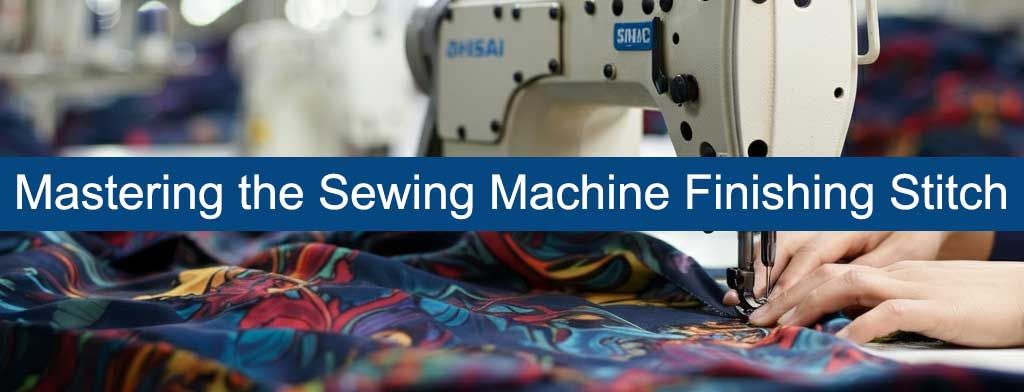
Chinese Factory Tutorial on Sewing Machine Finishing Stitches
Ensuring a polished, professional edge on your sewn creations is a critical step in the garment manufacturing process. Whether you're producing high volumes in a factory setting or sewing at home, mastering the art of finishing stitches on a sewing machine is vital for maintaining durability and a clean appearance. This tutorial will guide you through the fundamentals of sewing machine finishing stitches and help you choose the best stitch for your needs.
By exploring different stitches, techniques, and tools, you'll discover how to refine your sewing projects while enhancing the longevity of your products.
Introduction to Finishing Stitches
Finishing stitches are a crucial part of the sewing process, ensuring that your projects not only look polished but also stand the test of time. These stitches help prevent fraying along the raw edges of your fabrics, add strength to your seams, and give your garments or home décor items a professional finish. There are several types of finishing stitches you can use, each with its own advantages depending on the fabric and the look you want to achieve.
How to Do a Finishing Stitch on a Sewing Machine
Properly finishing fabric edges requires a clear understanding of your sewing machine’s settings and stitch options. Before you get started with the finishing stitch process, make sure you are ready by preparing your fabric and setting up your machine correctly. The goal is to prevent your fabric from fraying while ensuring a professional appearance. Follow these steps for sewing a finishing stitch successfully:
Step 1: Select the Right Stitch
Most sewing machines offer specific options for finishing seams. While zigzag stitches are the most common choice for edge finishing, other stitches, like the straight stitch or reverse stitch, may work depending on your project.
-
Zig Zag Stitch: Ideal for securing raw edges, especially on woven fabrics. This stitch mimics the look of overlocking without needing a dedicated serger. For most finishing needs, set your machine to a normal zigzag setting to prevent fabric fraying and achieve tidy seams.
-
Straight Stitch: Although not typically used for edge finishing on its own, it pairs well with pinking shears to secure seams.
-
Reverse Stitch: Often used to strengthen the start and end of your stitches, ensuring seams don’t unravel over time.
Tip: For certain finishing techniques, try adjusting your sewing machine needle position to the left for a more precise stitch finish.
Step 2: Prepare Your Fabric
Before beginning, make sure your fabric edges are even and that all fabric layers are properly aligned before trimming. Use sharp fabric scissors to trim any uneven ends or loose threads. Handling edges carefully will reduce fraying during stitching.
Depending on your finishing technique, you may need to separate the layers after stitching, or decide whether to finish a single layer or multiple layers together for the best results.
Step 3: Set Your Sewing Machine Correctly
To achieve a durable finish, you must adjust your sewing machine’s settings based on the fabric and stitch type.
-
Tension Settings: Ensure proper tension to avoid puckering or loose stitches. A medium tension (typically between 4–5) works well for most fabrics.
-
Stitch Length: Adjust the stitch length according to the type of stitch. Zig zag stitches often work best with a shorter stitch length (1.5–2mm).
Before sewing, test your settings on a fabric scrap to ensure you’ve achieved the desired result.
Tip: When adjusting the stitch width for zig zag stitches, always check that the needle does not hit the presser foot or overlock/overedge foot to prevent damage to your machine.
Step 4: Stitch the Edges
Carefully guide the fabric under the presser foot, aligning the raw edge with the selected stitch type. Maintain steady, even pressure on the pedal to keep your stitches consistent. For zig zag stitching, adjust the stitch width so that the zigzag just reaches the edge of the fabric for a clean finish. The machine sews the zigzag stitch by alternating the needle between the fabric’s edge and just beyond it. For extra durability, consider sewing two rows of zigzag stitches along the edge, especially on fabrics prone to fraying.
Step 5: Add Reinforcements
Once you’ve finished stitching the edges, use a reverse stitch at the start and end of your seams. This step secures the thread and prevents unraveling.
For proper ending, lift the needle and presser foot, then bring the thread through the last stitch. Turn the fabric or thread as needed to secure the seam. If your machine does not backtack, tie a double knot at the end for extra security. When ending your stitch, leave at least 1 inch—or several inches—of thread before cutting to allow for knotting. Always check that the bobbin thread is secure before trimming. Turning the fabric or thread and making a turn in your stitching process helps ensure a neat, durable finish.
Step 6: Trim Excess Fabric
After stitching, use fabric shears or snips to trim excess seam allowance close to the finished stitch line for a clean, professional look. For an even more precise finish, consider using a fabric cutter or a side cutter attachment, which trims the fabric edge while you sew, similar to a serger. Trimming close to the stitch line helps hide raw edges inside the seam, preventing fraying and giving your project a polished appearance.
What is the Best Stitch for Finishing Edges?
The “best” finishing stitch depends on the fabric type, project requirements, and the equipment available to you. Some finishing techniques are meant for specific fabrics or uses, so it's important to choose the right one for your project. Below is a comparison of some popular finishing techniques using a standard sewing machine. For certain fabric types, there are a couple of good options you can use, depending on your needs. Understanding these finishing stitches can also help you decide whether to make your own garments or buy them, as you'll be better equipped to assess construction quality.
1. Zig Zag Stitch
The zig zag stitch is versatile and a go-to option for finishing edges on woven fabrics. This stitch is created by alternating the needle in a zig-zag pattern along the raw edge, locking threads in place and reducing fraying.
Best for: Medium-weight woven fabrics, garments, and home décor projects.
Tip: For high-stress seams, repeat the zig zag stitch two or three times to add extra strength. Pair with pinking shears for increased durability.
2. Overlock Stitch
Some sewing machines feature an overlock or “mock serger” option. This stitch wraps around the fabric's edge, mimicking the finish you would achieve with a serger.
Best for: Lightweight to medium-weight fabrics needing a clean look.
Tip: Use this stitch for stretch fabrics to maintain flexibility in your seams.
3. Straight Stitch with Pinking Shears
For lightweight or delicate fabrics prone to fraying, trimming the edges with pinking shears and then securing them with a straight stitch is a fantastic option. Avoid using this method on fabrics with loose weaves, as they may still fray.
Best for: Lightweight fabrics such as chiffon and organza.
Tip: Ensure your stitch line is close to the raw edge for maximum durability.
4. Double Stitch with Reverse Stitch
A double line of straight stitches, reinforced with a reverse stitch, can provide durability without adding bulk. This is especially useful for seams that will not fray easily.
Best for: Heavyweight fabrics such as denim or canvas.
Tip: Press the stitched edge before sewing the second line for a more polished finish.
5. Bias Tape or Binding
If you’re finishing raw edges on garments or quilts, bias tape offers a decorative and clean finish. This method encases the raw edge in a strip of fabric, reducing bulk while creating an elegant look.
Best for: Apparel with exposed seams or home décor items like table linens.
Tip: For a neat result, first attach the bias tape to one side of the fabric, then fold it over and stitch in place. Ensure the bias tape is cut on the bias to prevent puckering.
6. French Seam
French seams are ideal for delicate fabrics or projects requiring a clean interior finish, such as blouses or baby clothes. Though time-intensive, the results are worth it, as raw edges are completely enclosed when the seam is turned and stitched.
Best for: Sheer and lightweight fabrics.
Tip: Account for extra seam allowance when planning your French seam.
Choosing the Right Stitch for Your Project
When deciding which finishing stitch to use, consider the following factors:
-
Fabric Type: Some stitches work better on certain fabrics. For example, zig zag stitching is perfect for cotton, while overlock stitches suit stretchy knits.
-
Project Type: Garments may require decorative finishes, while home décor projects like curtains benefit more from robust edge binding.
-
Equipment Availability: If you don’t have access to a serger, leaning on options like a zig zag stitch or straight stitch will help you achieve similar results.
Properly sewn seams with the right finishing stitch will last longer, prevent fraying, and give your project a more professional appearance.
If you’re working on high-end or professional projects, you may want to invest in a dedicated serger machine for impeccable finishes.
Best Practices for Finishing
Achieving a professional finish on your sewing projects involves following a few best practices for finishing stitches.
Start by selecting the right presser foot for your chosen stitch. An overlock foot or zigzag foot can help guide your fabric and prevent the needle from hitting the foot, ensuring your stitches stay in the right position. Before you begin, always check your stitch length and width settings to ensure your stitches are even and consistent across the edge of your fabric.
It’s a good idea to practice on a scrap piece of fabric first, especially if you’re working with a new material or trying out a different stitch. This little buffer gives you a chance to get a feel for how the fabric moves under the needle and how the stitches look, so you don’t have to worry about fraying or uneven results on your actual project. Remember to start and end each seam with a backstitch or reverse stitch—this locks your stitches in place and prevents them from coming undone over time.
The type of fabric you’re working with will often determine which finishing technique you should use. Heavier fabrics like denim or canvas may require a double row of stitches or a robust zigzag stitch to prevent fraying, while lighter fabrics such as cotton or silk might only need a straight stitch or a delicate zigzag. Alternatively, for extra durability, you can use a double stitch or reinforce the seam with a reverse stitch at the end. As you sew, keep the fabric moving smoothly and evenly, using your hands or a guide to maintain the right position and direction. Check your stitches as you go to ensure they’re even and not pulling or puckering the fabric.
Don’t forget to read reviews and watch tutorials online to learn new finishing techniques and stay current with the latest sewing trends. Following these best practices will help you achieve a clean, professional finish, prevent fraying, and save you money in the long run by reducing the need for repairs. With time, practice, and a willingness to learn, you’ll gain more control over your sewing and be able to finish your projects with confidence, no matter the fabric or technique required.
