Sewing With Overlocker: A Manufacturer's Guide
For textile manufacturers, the choice between a standard sewing machine and an overlocker is critical. An overlocker is basically a specialized sewing machine designed for finishing seams, trimming excess fabric, and creating professional-quality edges. The terms 'overlocker' and 'overlock machine' are interchangeable, and in some regions, especially in North America, the term'serger' is used instead. While both machines are essential tools, they serve distinct purposes in garment construction. Understanding the capabilities of an overlock machine is key to professional-grade quality, improving efficiency, and ensuring product durability. This guide provides an overview of overlocker fundamentals for industrial application.
Understanding the Overlocker
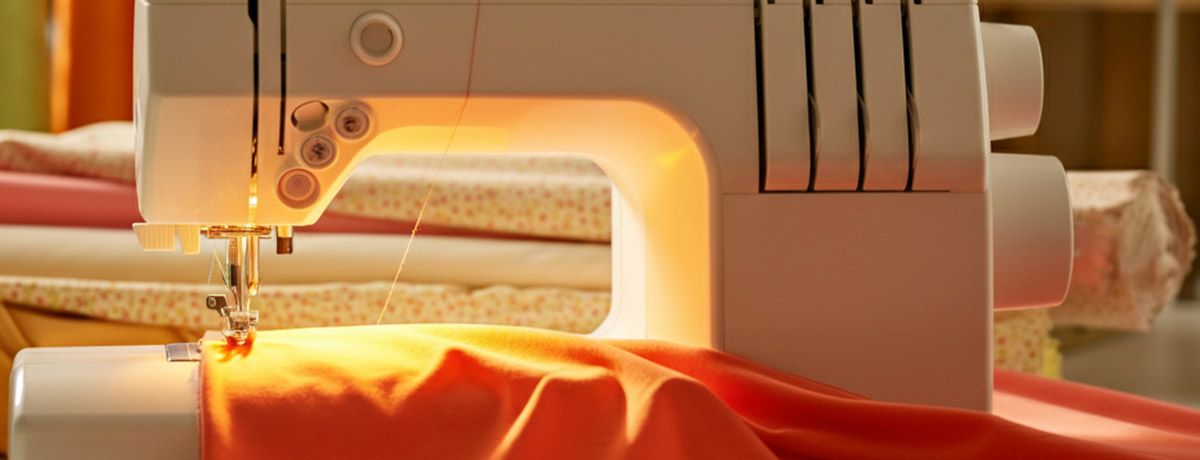
An overlocker, also known as a serger, is a specialized sewing machine designed to join, trim, and finish seams in one operation. Its primary function is to create a clean, durable edge that prevents fabric from fraying. Overlocking is the process of finishing and securing fabric edges using the overlocker.
-
Key Functionality: Unlike a standard sewing machine that creates a lockstitch, an overlocker uses multiple threads (typically 3 to 5) to loop over the seam’s edge. Looper threads are essential for forming the overlock stitch, wrapping around the fabric edge to secure it. This creates the characteristic overlock stitch.
-
Integrated Blade: A key feature is the built-in knife that trims the raw fabric edge just before the stitch is formed. This results in a perfectly neat finish that is difficult to replicate with other methods.
-
Fabric Handling: Overlockers excel with stretchy and knit fabrics. The differential feed mechanism, available on many models, allows operators to adjust the speed of the front and rear feed dogs. This prevents the puckering or stretching common when sewing knits on traditional sewing machines. Needles play a crucial role in stitch quality and must be chosen according to fabric type.
Choosing the Right Overlocker
Selecting the ideal overlocker for your sewing needs is a crucial step in achieving professional results, whether you’re outfitting a manufacturing floor or setting up a home studio. Start by considering the types of fabrics you’ll be working with most often. If your projects involve a lot of knit or stretchy fabrics, prioritize a serger equipped with a differential feed. This feature ensures your stitching remains smooth and even, preventing unwanted stretching or puckering.
Pay close attention to the number of threads the machine can handle. A 4-thread overlocker strikes a great balance between versatility and ease of use, making it suitable for a wide range of sewing projects. Adjustable stitch length and width are essential for customizing your overlock stitch to suit different fabric weights and seam requirements. Look for a machine with a reliable knife blade, which will trim excess fabric cleanly as you sew, ensuring a neat finish on every seam.
Brands like Bernina are known for their robust construction and advanced features, such as easy threading systems and precise tension dials. These features can save valuable time and reduce frustration, especially when switching between projects or fabrics. Consider your budget, but remember that investing in a quality overlocker can pay off in the long run with improved efficiency and stitch quality. By evaluating your specific needs and researching available options, you’ll be able to choose a machine that enhances your sewing experience and delivers consistent, professional results.
Setting Up and Using Your Overlocker
Getting started with your overlocker may seem challenging, but with a bit of practice, the process becomes second nature. Begin by carefully threading your machine, following the manufacturer’s guide to ensure each thread—especially the upper looper thread and lower looper thread—is correctly positioned. Using high-quality serger thread is important, as it’s designed to withstand the speed and tension unique to overlock machines.
Once threaded, adjust the tension dials for each thread to achieve a balanced stitch. It’s a good idea to test your settings on a scrap piece of fabric, checking that the overlock stitch wraps securely around the seam edges without pulling or leaving gaps. If you notice any fraying or uneven stitching, fine-tune the tension dials or re-thread the machine as needed.
When you’re ready to sew, guide your fabric under the presser foot, aligning the raw edge with the cutting knife. Use a straight stitch or zigzag stitch as a reference for guiding the fabric, ensuring the seam edges are neatly finished. Keep an eye on the thread chain at the end of each seam, and practice starting and ending your stitching for a clean result. With regular use, you’ll gain confidence in setting up your overlocker and producing strong, professional seams and hems on every project.
The Overlock Stitch and Seam Finishing
The primary advantage of an overlocker lies in its seam finishing capabilities. The overlock stitch encases the raw edge, providing a secure and professional finish that stands up to wear and washing. Using an overlocker to finish seam edges is essential for durability and achieving a professional look, especially on woven fabrics.
-
Preventing Fraying: For manufacturers, preventing fraying is essential for product longevity and customer satisfaction. The overlock stitch is the industry standard for finishing interior seams on most garments, and there are different types of overlock stitches available to suit various fabrics and finishing needs.
-
Adjustability: Stitch length and width can be adjusted to suit different fabric weights and types. A shorter stitch length provides more coverage for lightweight fabrics, while a wider stitch is suitable for heavier materials. You can also adjust settings for different types of hems, such as rolled hems or narrow hems, to achieve the desired finish.
-
Alternatives: In the absence of an overlocker, a zigzag stitch on a standard sewing machine can serve as a basic alternative for finishing seam edges. However, it does not offer the same durability, speed, or clean-cut finish as an overlock stitch.
Seams can be sewn and finished in one step with an overlocker, making it an efficient choice for garment construction and professional seam finishing.
Mastering Basic Overlocker Techniques
Proper operation is crucial for maximizing efficiency and maintaining quality control in a manufacturing setting.
-
Threading: Correctly threading the machine, including the upper and lower loopers, is the most critical step. Color-coded guides on industrial machines simplify this process for operators. For certain overlock stitches, you will need to use two needles; make sure both are properly installed and threaded according to the machine’s instructions. When setting up or finishing a seam, gently pull the thread chain or fabric to ensure the stitches are secure and properly formed.
-
Tension Control: Each thread has its own tension dial. Balanced tension is essential for a flat, even stitch. Incorrect tension can lead to looped or pulled seams, compromising the garment’s quality. If you are using two needles, check that the tension is balanced for both to achieve the desired stitch width and quality.
-
Seam Allowance: The overlocker’s knife trims the fabric as it sews. Operators must accurately guide the material to maintain the correct seam allowance, ensuring consistent garment sizing. It is important to make a point of being precise with seam allowances, as even small inaccuracies can affect the final fit and appearance of the garment.
A helpful tip for beginners is to practice on scrap fabric and use the color-coded guides to become familiar with threading and tension adjustments.
Troubleshooting and Perfecting the Craft
In a production environment, minimizing downtime is paramount. Understanding common issues can help operators quickly resolve problems. When setting up a new serger, users may encounter challenges with threading, tension adjustments, or selecting the correct stitch type, so consulting the manual and practicing on scrap fabric is recommended.
-
Thread Breakage: incorrect threading often causes this, improper tension, or using the wrong needle type for the fabric. Regular machine maintenance, including cleaning and oiling, can also prevent this.
-
Uneven Stitching: If stitches are uneven, the first step is to check the tension dials. Re-threading the machine completely can also resolve many stitching issues. Some overlockers offer a chain stitch option, which can be useful for decorative details or attaching trims, and troubleshooting its setup may differ from standard overlock stitches.
-
Fabric Issues: When working with delicate fabrics like silk or sheer cottons, it is important to use a new, sharp needle and adjust the differential feed to prevent gathering. For heavy-duty fabrics, a larger needle and thicker serger thread are required. Managing extra fabric is crucial when trimming and finishing seams to ensure neat edges and avoid bulky results.
Mastering Overlocker Projects
Building your skills with an overlocker opens up a world of creative possibilities, from everyday clothes to intricate quilts and home decor. Start by practicing basic techniques, such as sewing straight seams and finishing raw edges, to get comfortable with the machine’s stitch length and handling. As you gain confidence, experiment with more advanced stitches like the flat lock stitch or rolled hems, which add a polished touch to garments and accessories.
When working with delicate fabrics, use a shorter stitch length and adjust the tension to avoid puckering or damaging the material. For stretchy fabrics, the differential feed is your best friend, helping to maintain the fabric’s shape and prevent distortion. Always press seam allowances to one side after sewing to reduce bulk and achieve a smooth, professional finish.
Don’t hesitate to try new projects—overlockers are perfect for sewing knit garments, finishing seam allowances on jeans, or adding decorative edges to lightweight fabrics. With each project, your skills will grow, and you’ll discover new ways to use your overlocker for both functional and creative sewing. Whether you’re a beginner or looking to expand your repertoire, consistent practice and a willingness to experiment will help you master overlocker techniques and produce high-quality, ready-to-wear clothing and more.
A Vital Tool for Production
For wholesale and manufacturing businesses, the overlocker is not a luxury but a necessity. It provides the speed, durability, and professional finish required for high-volume garment production, especially when working with a variety of patterns and selecting the right pattern for each garment. Not everyone has access to industrial overlockers, but there are alternative methods for finishing seams to achieve a similar look. Overlockers are essential for creating strong, neat seams on the garments people wear clothes every day, ensuring a polished appearance.
There is real fun and satisfaction in mastering overlocker techniques, making the sewing process both engaging and rewarding. We hope this guide inspires you to improve your sewing processes and find joy in your craft. Many manufacturers and operators are hoping that investing in new equipment will streamline their workflow and boost efficiency. When you search for the best machine or technique, consider your production needs and the types of patterns you use most often.
As we wrap up this guide, remember that wrapping the fabric edges with an overlocker not only secures seams but also elevates the quality of your finished products. This wrap-up highlights the key points for optimizing your production with overlockers and patterns, encouraging you to continue exploring and enjoying your sewing journey.
Contact MH
MH offers overlock threads. Please contact us for more details or inquiries. We're here to help!