How to Create Perfect Overlocked Hems with Your Overlocker
Professional garment manufacturing demands precision at every stage, and hemming represents a critical finishing technique that separates quality production from amateur work. The rolled hem created with an overlocker delivers the clean, durable edge finish that wholesale buyers and manufacturers require for commercial-grade garments. The main difference between an overlocked hem and traditional hemming methods is the creation of a secure overlocked edge, which not only prevents fraying but also results in a more professional and long-lasting finish.
Overlocked hems provide superior stretch retention and professional appearance compared to traditional hemming methods. A clean overlocked edge also reinforces garment seams, enhancing their durability and ensuring a polished, high-quality look. This technique proves essential for manufacturers working with knit fabrics, delicate materials, and high-volume production where consistency and speed matter most.
Understanding Overlock Stitch Fundamentals
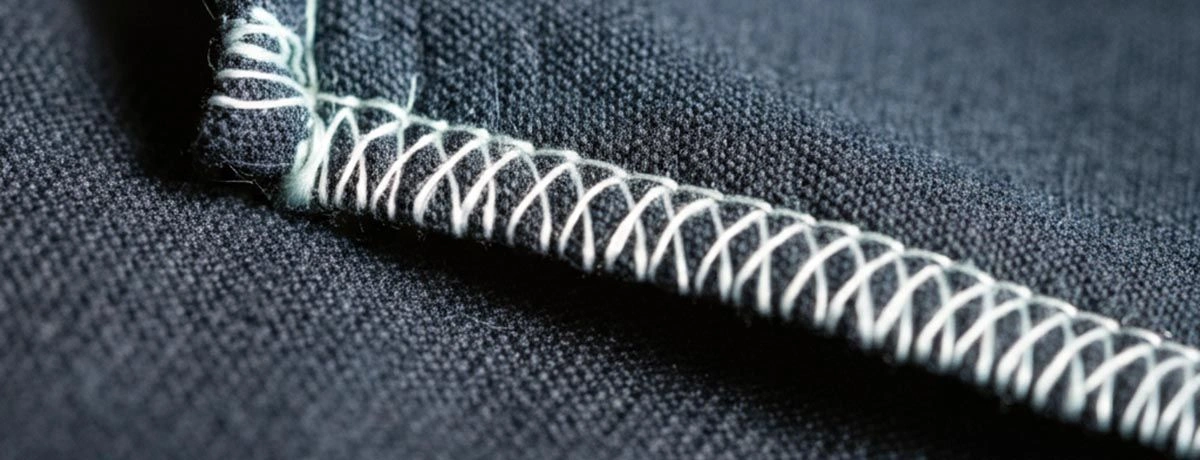
The overlock stitch creates a finished edge by trimming excess fabric while simultaneously encasing the raw edge with thread. This process produces a flat, flexible seam that withstands repeated washing and wear cycles—critical factors for commercial textile applications. Overlockers can produce a variety of stitches, each suited for different applications such as hemming, seaming, or decorative finishes, depending on the thread configuration and stitch structure.
Modern overlockers utilize multiple threads (typically 3-4 threads) working in coordination. The needle threads penetrate the fabric while looper threads create the characteristic overlock formation on the fabric’s underside. The point at which the needle threads and looper threads meet is crucial for forming a secure and professional overlock stitch. This construction method eliminates bulk while maintaining seam integrity.
Essential Machine Components
Professional overlockers feature adjustable differential feed mechanisms that prevent fabric stretching during the hemming process. The upper looper and lower looper work together to create consistent thread formation, while the cutting blade trims fabric to precise measurements. To achieve the best stitch quality, it is important to adjust all the settings, such as tension, stitch length, differential feed, and cutting width.
The stitch width and length controls allow operators to customize the overlock stitch for different fabric weights and applications. Narrower settings work best for lightweight fabrics, while wider settings accommodate heavier materials typically used in commercial manufacturing.
Setting Up Your Overlocker
Proper setup is the foundation for creating flawless rolled hems with your overlocker. Begin by threading your machine with the appropriate threads, making sure to follow the threading path for the left needle and lower looper threads as outlined in your manual. Adjust the stitch length to a shorter setting, typically between 1.5 and 2mm, to ensure a tight, secure hem. Set the stitch width to the recommended value for rolled hems, and position the differential feed to neutral to prevent unwanted stretching or gathering. Before starting your main project, always test your settings on a scrap piece of fabric similar to your garment material. This allows you to fine-tune the tension, stitch length, and width for the best results. Don’t forget to lift the presser foot when positioning your fabric to avoid snagging or misalignment. Refer to your overlocker’s manual for any machine-specific instructions, and make adjustments as needed to suit the fabric and hem style you’re aiming to create.
Selecting Equipment for Commercial Production
Commercial-grade overlockers from manufacturers like Bernina offer the durability and precision required for high-volume operations. These machines maintain consistent tension across extended production runs while delivering uniform stitch quality.
Thread selection impacts both appearance and performance. Polyester threads provide excellent strength and color retention for most commercial applications. Specialty threads like woolly nylon create superior stretch recovery in activewear and intimate apparel production.
Needle and Foot Selection
The left needle position creates narrow hems suitable for lightweight fabrics, while the right needle position works better for medium-weight materials. Rolled hem feet guide fabric through the machine at consistent angles, ensuring uniform hem width across production batches.
Narrow hem feet work effectively with delicate fabrics that require gentle handling. These specialized presser feet maintain proper fabric positioning while preventing puckering or stretching during the hemming process.
Creating Rolled Hems with Your Overlocker
Once your overlocker is set up, you’re ready to start creating beautiful rolled hems. Begin by folding the raw edge of your fabric over twice, forming a narrow, enclosed edge. Align the folded edge with the edge of the stitch plate, ensuring the raw edge is positioned correctly for the overlock stitch to encase it. Set your stitch length and width according to your fabric type, and adjust the differential feed to maintain a smooth, even hem—this is especially important for curved hems or delicate materials. As you sew, gently guide the fabric so the folded edge remains even, and keep a steady pace to produce a consistent stitch. For straight hems, maintain a straight line along the edge of the fabric; for curved hems, follow the garment’s shape carefully, adjusting your handling as needed. Keeping the fabric taut, but not stretched, will help prevent puckering and ensure a crisp, professional finish on every hem.
Fabric Edge Preparation
Clean, straight fabric cutting ensures consistent hem appearance across production runs. Remove any loose threads or fabric irregularities before beginning the hemming process, and trim a bit of fabric if needed to ensure a clean edge. Consistent fabric preparation reduces machine adjustment requirements and improves production efficiency.
Position the fabric edge against the machine’s cutting blade, allowing approximately 3mm of fabric to extend beyond the blade. For a rolled hem, leave a hem allowance of about 3mm to 5mm to achieve a neat finish. This positioning ensures complete edge encasement while maintaining proper stitch formation.
Working with Different Fabric Types
Knit fabrics require specific handling techniques to prevent stretching and distortion. Before hemming, fold the fabric with the wrong side facing out, ensuring the fold is even along the marked line. Use woolly nylon thread in the loopers to provide additional stretch recovery. Adjust the differential feed to 1.2-1.5 to accommodate the fabric’s natural stretch characteristics.
Woven fabrics generally work well with standard polyester threads and minimal differential feed adjustment. When working with woven fabrics, press and sew on the wrong side to avoid visible stitching on the right side, resulting in a neat, professional finish. However, bias-cut woven materials may require increased differential feed settings to prevent edge stretching during the hemming process.
Delicate Fabric Considerations
Lightweight and delicate fabrics benefit from reduced presser foot pressure and shorter stitch lengths. Use fine needles (size 70/10 or 80/12) to minimize fabric damage while maintaining proper thread formation.
Test stitch settings on fabric scraps before beginning production runs. This practice prevents costly errors and ensures consistent results across large batches.
Comparison to Other Machines
While an overlocker is the preferred machine for creating rolled hems due to its speed and precision, you can also achieve similar results with a regular sewing machine or a serger. A regular sewing machine can be used to sew rolled hems, often with the help of a specialized rolled hem foot, but it may require more careful handling and multiple passes to achieve a neat, even finish. Sergers, which are similar to overlockers, can also produce an overlock stitch, but may not offer the same level of control over stitch width and differential feed as a dedicated overlocker. Some domestic sewing machines, such as those from Bernina, come with a variety of feet designed for different hemming techniques, including rolled hems, which can help you achieve a professional look even without an overlocker. Ultimately, while all these machines can finish hems, the overlocker stands out for its ability to create consistently neat, durable rolled hems with minimal effort.
Conclusion and Next Steps
Mastering rolled hems with your overlocker is a valuable skill that will enhance the quality and appearance of your sewing projects. By following the steps and tips outlined in this post, you can confidently create hems that look polished and professional on any fabric. To further develop your technique, practice on scrap fabric or start with simple projects like skirts or pants to build your confidence. Experiment with different stitch lengths and widths to see how they affect the final look of your hem. For more detailed instructions, inspiration, and troubleshooting tips, be sure to explore our blog, watch our videos, and check out our other posts. Your overlocker’s manual and online resources are also excellent guides for machine-specific advice. With regular practice and a willingness to experiment, you’ll soon be able to create beautiful rolled hems that give your garments a truly finished edge.
Contact MH
MH offers overlock threads. Please contact us for more details or inquiries. We're here to help!