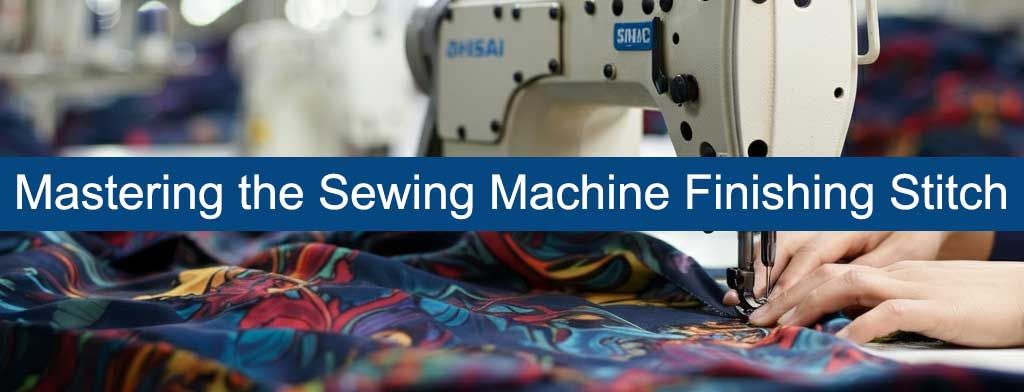
Mastering the Sewing Machine Finishing Stitch for Perfect Edges
Sewing is not just about stitching pieces of fabric together; it’s about artfully crafting garments and crafts with polished, professional results. One essential skill that stands between a beginner and a seasoned seamstress is mastering the finishing stitch for raw edges. Not only does it prevent fraying, but it also adds refinement to your sewing projects by properly securing and finishing the ending stitches.
Before getting started with your sewing projects, it's crucial to understand fabric types and techniques to ensure the best results.
This guide will take you step-by-step through different methods and tips to help you become an expert at finishing stitches. Whether you’re making garments, household items, or accessories, these techniques will level up your sewing skills for impeccable results. You don't need to worry about the absence of specific tools like an overedge or overlock foot; you can still achieve great results by testing and adjusting your zigzag stitch technique.
Introduction to Finishing Stitches
Finishing stitches are an essential part of the sewing process, as they help prevent fraying and give a professional finish to your garments. There are various types of finishing stitches, including the zigzag stitch, overlock stitch, and straight stitch, each with its own unique characteristics suited for specific fabrics and sewing projects.
Understanding the different types of finishing stitches and how to use them is crucial for achieving a high-quality finish. Finishing stitches can be used to finish raw edges, prevent unraveling, and add a decorative touch to a garment. The right position of the stitch is important to ensure that it is effective in preventing fraying and giving a professional finish.
The last few stitches of a seam should be reinforced with a reverse stitch to prevent the seam from coming undone. It’s essential to check the stitch length and width to ensure that it is suitable for the type of fabric being used. Rows of stitching can be used to add strength and durability to a seam. Finishing stitches can be used to finish seams in a variety of directions, including straight and curved lines, ensuring your projects are both durable and aesthetically pleasing.
Why Finishing Stitches Matter
Finishing stitches are the unsung heroes of sewing. They prevent your fabric’s raw edges from unraveling with wear and washing, ensuring lasting durability. Professional finishes help the seams hold up during laundering and prevent fraying. Beyond practical benefits, neatly finished edges elevate your sewing projects, giving them a clean, polished, and professional look.
From the simple zigzag stitch to advanced serger techniques, finishing stitches offer diverse solutions for different fabrics and designs. They effectively hide raw edges, particularly in sheer fabrics and unlined garments, to ensure a polished appearance both inside and out.
Understanding Raw Edges
Raw edges are the unfinished edges of fabric that can fray and unravel if not properly finished. Finishing these edges is crucial to maintaining the integrity and appearance of your sewing projects. Raw edges can be finished using a variety of techniques, including zigzag stitching, overlocking, and binding, each suited to different types of fabrics.
The type of fabric being used will determine the best method for finishing the raw edges. For example, delicate fabrics may require a narrower stitch width to prevent damage, while heavier fabrics may require a wider stitch width to prevent fraying. It’s essential to review the fabric type and choose the right finishing technique to ensure a professional finish.
Raw edges can be finished before or after sewing, depending on the project requirements. Finishing raw edges can help prevent fraying and give a neat finish to the garment. The foot of the sewing machine can be used to guide the fabric and ensure that the stitch is in the right position. Alternatively, a serger can be used to finish raw edges, especially for heavier fabrics, providing a clean and durable edge.
Choosing the Right Stitch
When finishing raw edges, your choice of stitch depends on the fabric type, seam purpose, and the look you’re trying to achieve. Completing this step before starting a sewing project can help prevent fraying and ensure a clean finish. Here are some common stitches and their applications:
For precise results, consider leaving a length of thread, such as 6 inches, to ensure stitches are secured properly.
Zigzag Stitch
The zigzag stitch is a favorite among sewing enthusiasts due to its versatility. It’s excellent for finishing lightweight to medium fabrics, preventing fraying efficiently while creating a neat edge.
-
Adjust the stitch width and length to suit your fabric. The points of the zigzag stitch should just reach the edge of the fabric to effectively finish seams.
-
Adjusting the stitch width and length gives you more control over the fabric, especially when navigating curves, to achieve a clean and precise finish.
-
Use this stitch for woven cotton, knits, and fabrics prone to minor fraying.
Straight Stitch
While primarily used for seams and topstitching, a closely stitched straight stitch can finish raw edges for robust fabrics like denim or canvas. On heavier fabrics, it provides durability without compromising the finish.
-
Pair with trimming to reduce bulk for a clean edge. After performing a straight stitch, tie a double knot to secure the loose threads.
-
Trim excess fabric, leaving about 1 inch to ensure precision and a neat finish.
Overcast Stitch
The overcast stitch combines sewing and finishing in one step. Available on many modern sewing machines, it’s designed to enclose raw edges, mimicking a serger’s function.
-
Ideal for delicate fabrics requiring precise finishes. Lift the needle and the presser foot lever to prepare the fabric for removal after stitching.
-
Use an overcast foot for guided, even stitching. Slowly turn the handwheel towards you to check the needle's position and ensure it does not hit the presser foot while adjusting settings for different stitch types. For projects that require setting grommets or eyelets, you might also consider a Hand Press Grommet Eyelet Machine for added precision and ease.
Specialty Stitches
If your sewing machine has overedge or double overedge stitch settings, these can elevate your finishing. Refer to your machine’s manual to explore and practice these options.
For light to medium weight woven fabrics, consider using the 'turned and stitched' finish. This technique involves folding the fabric to expose the seam allowance and sewing along the edges to create a clean finish.
The appropriate finishing method can depend on whether the sewing technique is applied to one layer or two layers of fabric. Some stitches, such as zigzag, can be performed on separate seam allowances, while others may require both layers to be stitched together for effectiveness. The thickness and type of fabric play a significant role in determining the best finishing method.
Working with Zigzag Stitches
The zigzag stitch is one of the most beginner-friendly and effective finishing techniques for raw edges. Here’s how to master it:
-
Adjust Settings: Experiment with stitch width and length to achieve your desired edge finish. For lightweight fabrics, start with a moderate width and short length. The points of the zigzag stitch should just reach the edge of the fabric to effectively finish seams.
-
Use the Right Foot: A zigzag or overlock foot can guide the fabric more precisely, preventing puckering and giving you more control over the fabric.
-
Test First: Always practice on scrap fabric to ensure the settings are correct for your project.
The zigzag stitch works particularly well for woven fabrics like cotton, preventing fraying while maintaining flexibility.
Machine Stitching Techniques for Perfect Edges
Mastering basic stitching techniques will significantly improve your finishing results.
-
Backtacking: Begin and end every seam with a few stitches in reverse to secure your threads and prevent unraveling. After stitching, lift the needle and the presser foot lever to prepare the fabric for removal without damaging the stitches.
-
Consistent Seam Allowances: Use sewing guides or tape markers to keep your stitches at a consistent distance from the fabric edge, ensuring uniformity and neat appearance. Slowly turn the handwheel towards you to check the needle's position and troubleshoot any stitching issues.
-
Serger Alternative: While not everyone owns a serger, some sewing machines emulate its functionality with dedicated stitches and feet. Consider investing in one if you frequently sew with loosely woven fabrics.
Carefully threading your machine and selecting the right needle are equally important for quality finishes.
Sewing Machines for Finishing
Sewing machines can be used to finish seams and raw edges using a variety of stitches, including the zigzag stitch and overlock stitch. The type of sewing machine being used will determine the types of stitches that are available. Some sewing machines come with specialized feet, such as the overlock foot, that can be used to guide the fabric and ensure accurate stitching.
The brand and model of the sewing machine can affect the quality of the stitch and the ease of use. It’s essential to read the manual and understand the different stitches and settings available on the machine. The direction of the stitch can be adjusted to suit the type of fabric being used, and the length and width of the stitch can also be adjusted to achieve the desired finish.
A little buffer or guide on the foot can help to ensure that the stitch is in the right position. The bobbin thread should be checked regularly to ensure that it is not tangled or twisted. Regular maintenance of the sewing machine can help to prevent problems and ensure that it continues to produce high-quality stitches. By understanding and utilizing your sewing machine’s features, you can achieve professional-grade finishes on all your sewing projects.
Finishing Raw Edges
Raw edges left unfinished tend to fray, compromising your project’s durability over time. Here are several techniques to give your work a polished edge:
-
Trim Excess Fabric: After stitching, trim the fabric edge neatly. Trimming close to the stitches reduces bulk and creates a clean finish. Leave about 6 inches of excess thread for knotting and pulling the thread to create a loop that's at least 1 inch wide, ensuring precision in your sewing.
-
Pinking Shears: These scissors produce a zigzag cut, reducing fraying while adding a decorative touch. A great solution for lightweight fabrics. If your sewing machine does not backtack effectively, tie a double knot to secure the loose threads after performing a zigzag stitch.
-
Binding Edges: Bias binding or seam binding can enclose rough edges while adding a pop of contrasting or matching color.
Always finish raw edges immediately to avoid fraying during handling or washing.
Leveraging Specialty Feet and Stitches
Modern sewing machines often come with specialty presser feet and advanced stitch patterns for professional-grade finishing. One such technique is the 'turned and stitched' finish, which involves folding the fabric to expose the seam allowance and sewing along the edges to create a clean finish, particularly suitable for light to medium weight woven fabrics.
-
Overlock and Overcast Feet: These feet ensure that stitches are applied close to the fabric edge for secure finishes.
-
Walking Foot: This even-feed foot prevents fabric layers from shifting, which is particularly helpful when working with slippery materials like silk or satin.
-
Practicing with Extras: Experiment with decorative finishing stitches to add personality to your edges.
Referring to your sewing machine’s instruction manual will help you understand and utilize rivet and snap settings and these advanced features effectively.
Tips for Achieving Perfect Edges
A polished sewing project isn’t just about the stitching—it’s about adopting the right techniques throughout the process.
-
Consistent Seam Allowance: Use guides on your sewing machine or a seam gauge to maintain consistency. After stitching, lift the needle and the presser foot lever to prepare the fabric for removal without damaging the stitches.
-
Press as You Go: Ironing your seams after stitching reduces bulk and creates crisp folds, giving your project a professional appearance.
-
High-Quality Supplies: Invest in durable thread and needles suited to your fabric to prevent breakages and enhance stitch quality.
-
Machine Maintenance: Keep your sewing machine clean and oiled to ensure smooth operation. Slowly turn the handwheel towards you to check the needle's position and troubleshoot any stitching issues.
These small practices combine to make a noticeable difference in your finished projects.
Mastery Comes with Practice
Finishing raw edges and mastering the sewing machine finishing stitch take time and patience. Follow tutorials, explore your sewing machine’s features, and challenge yourself with different fabrics and techniques. Learning basic techniques such as stitching styles and seam allowances is crucial in this initial stage.
Professional-quality results are achievable with proper knowledge and practice, bringing your sewing projects to life beautifully. Ensure you leave a length of 60/3 100% Spun Polyester Sewing Thread, such as 6 inches, to secure your stitches properly and maintain precision in your sewing tasks.
By investing time in understanding finishing stitches and testing different methods, you’ll build the expertise needed to create polished, durable pieces.
